|
|
»
|
|
Instructions for use of the JLV Ligature |
|

|
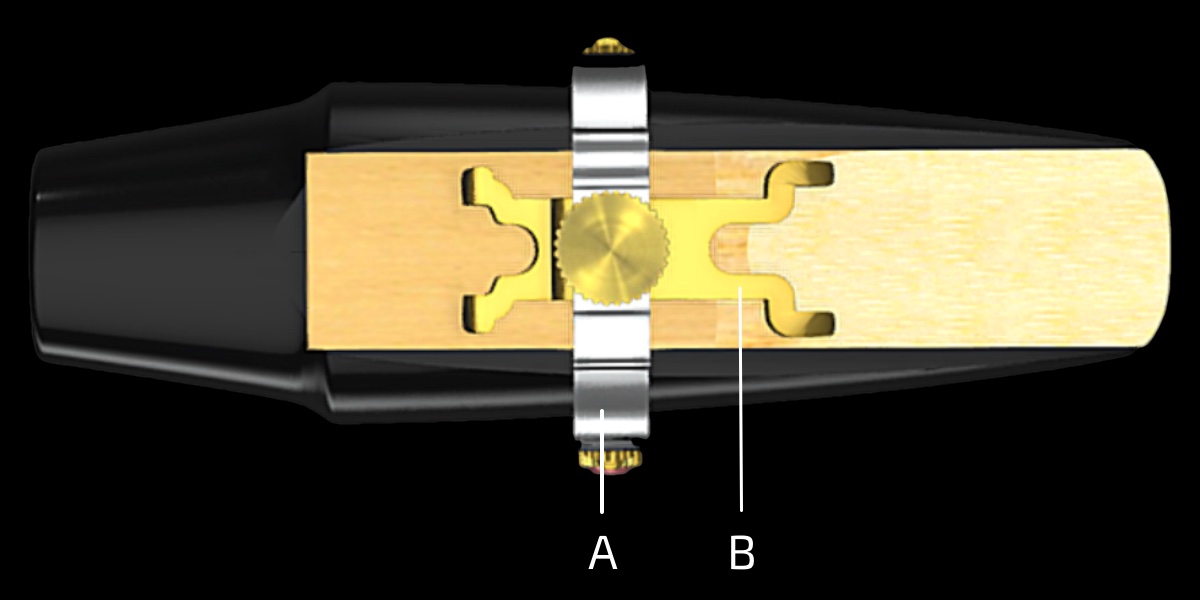
The main parts of the ligature
|
|
|
|
The JLV Ligature is compose of two main parts :
- A : The belt
- B : The base
|
|

|
|
The ligature have a meaning
|
|
|
|
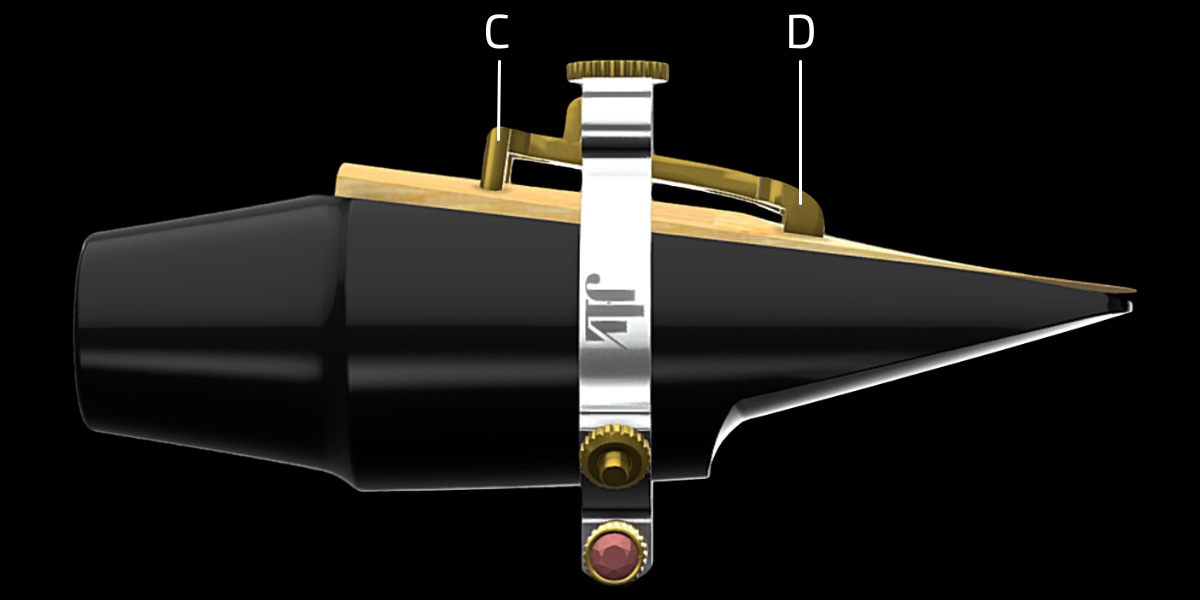
The base consists of two parts :
- C : Rear pads, shortest part
- D : Front pads, longest part
It is advisable to place the reed on the mouthpiece before positioning the ligature.
|
|
|
|
Adjusting the JLV Ligature on the reed
|
|
|
|
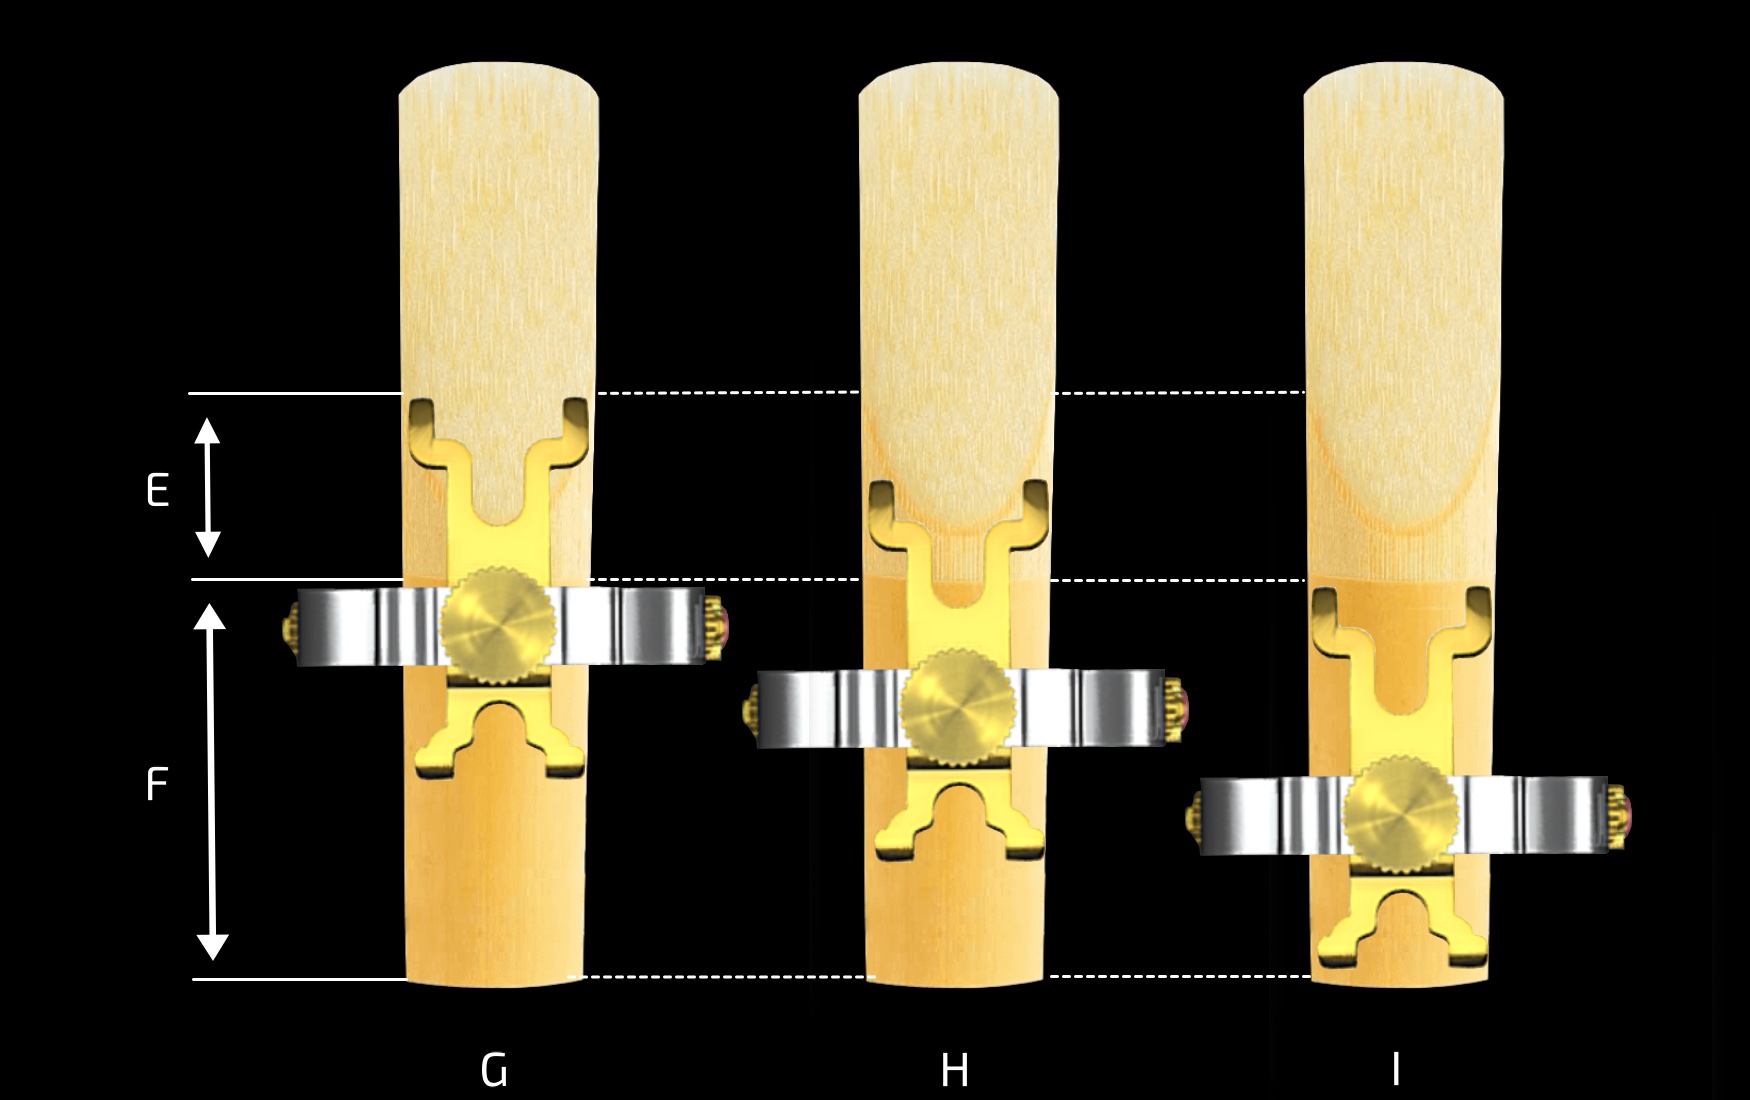
The reed in details :
- E : Declination
- F : Stock
The location of the front pads of the ligature on the reed can change everything to a millimeter, there is not a single position :
- G : Most advanced position on the declination, sound amplitude is tightening
- H : Most recessed position on the declination, harmonics are released
- I : Exception for Bb & A / Eb clarinets models and soprano saxophone ebonite and metal mouthpieces
|
|
|
|
The role of the screws and the pliers
|
 |
|
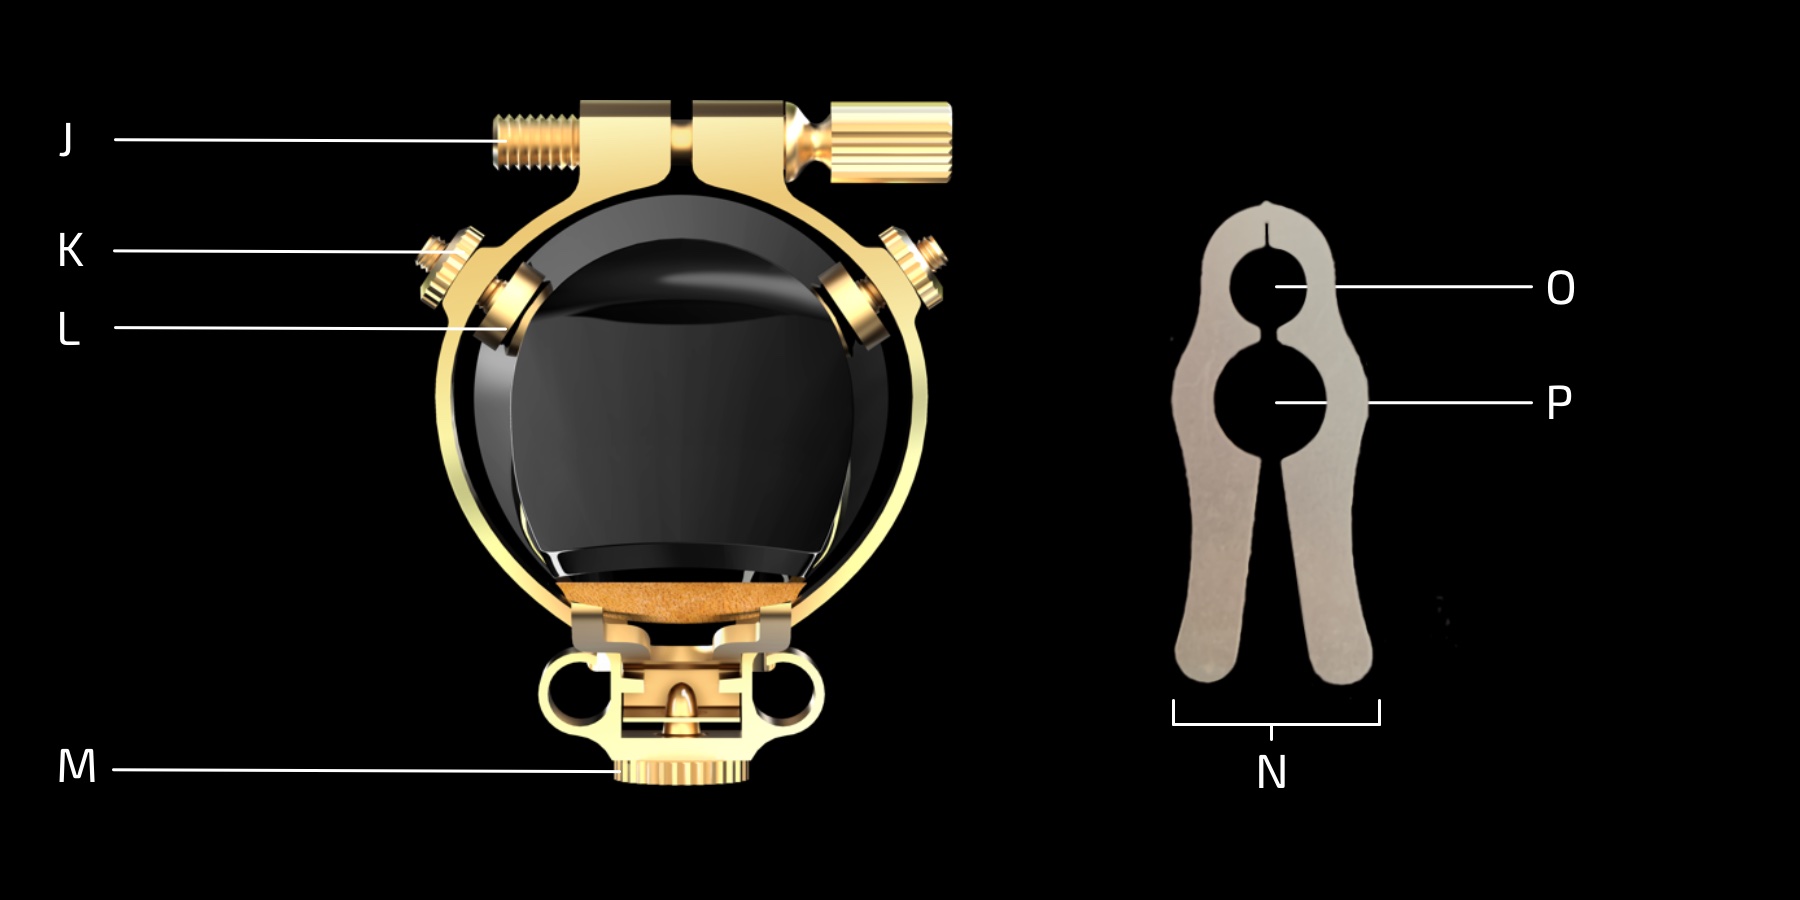
The ligatures are adjusted for standard mouthpieces sizes, usually, only the belt screw needs to be manipulated :
- J : Belt screw, allows to tighten the belt around the mouthpiece once positioned, the less you tighten, the more you release the harmonics
- K : Nuts, to lock the side screw
- L : Side screw, allow to adjust the ligature to particular mouthpiece sizes. Both screw must be symmetrically tightened or loosened
- M : Base screw, it holds the base on the belt, it must remain tight to the maximum,
- N : Pliers
- O : Location to tighten the nuts (and the small base of the screw for Bb & A / Eb clarinets and soprano saxophone)
- P : Location to tighten the base of the screw
|
|
|
|
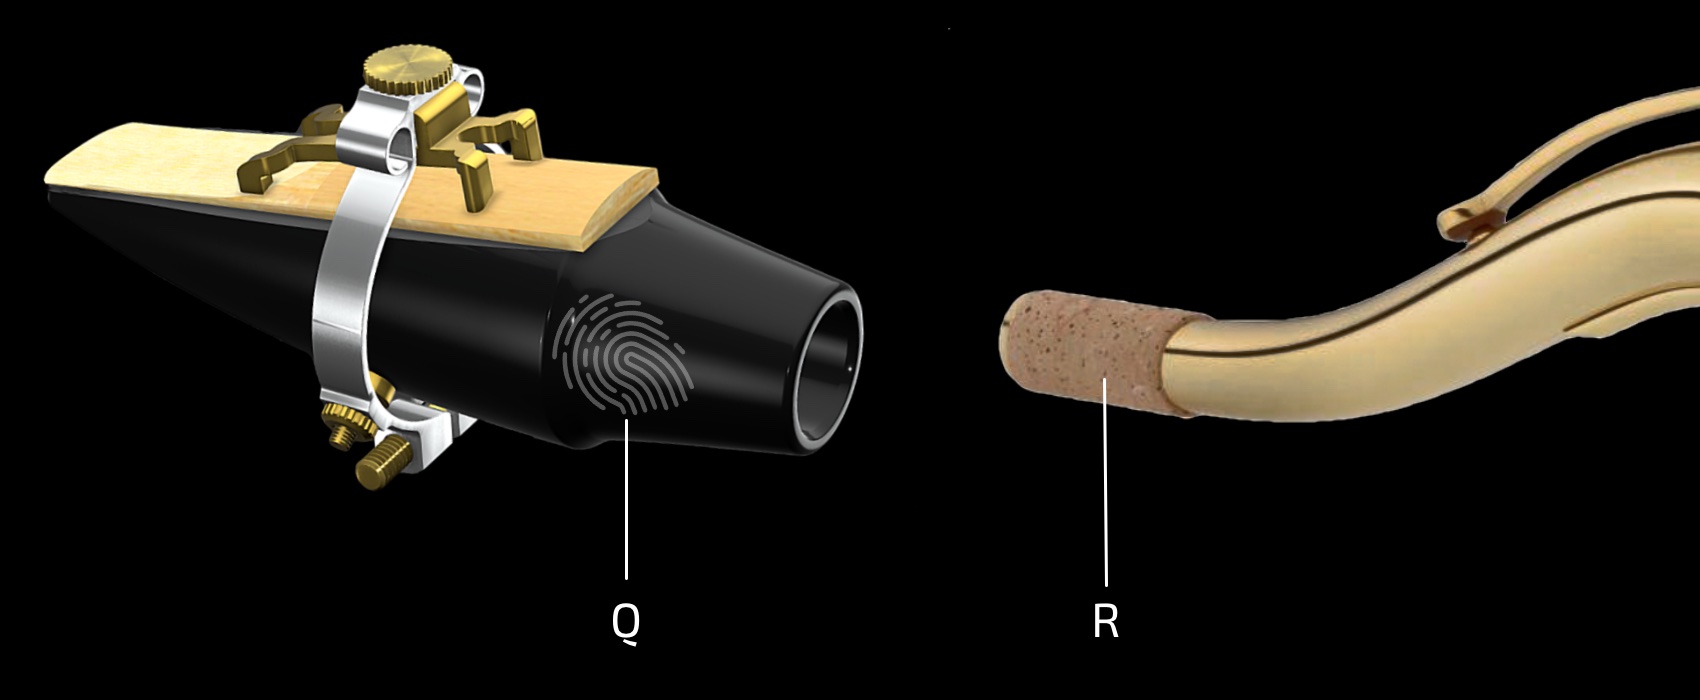
Setting up the mouthpiece on the neck or barrel
|
 |
|
The mouthpiece must be inserted on the saxophone neck or clarinet barrel without taking it in the palm of the hand :
- Q : Landmark, to hold your mouthpiece without touching the ligature when adjusting it on the neck or barrel
- R : Cork (saxophone neck or clarinet mouthpiece), it must be perfectly sanded to avoid forcing. For this, we advise you to get closer to your repair shop
|
|
|
|
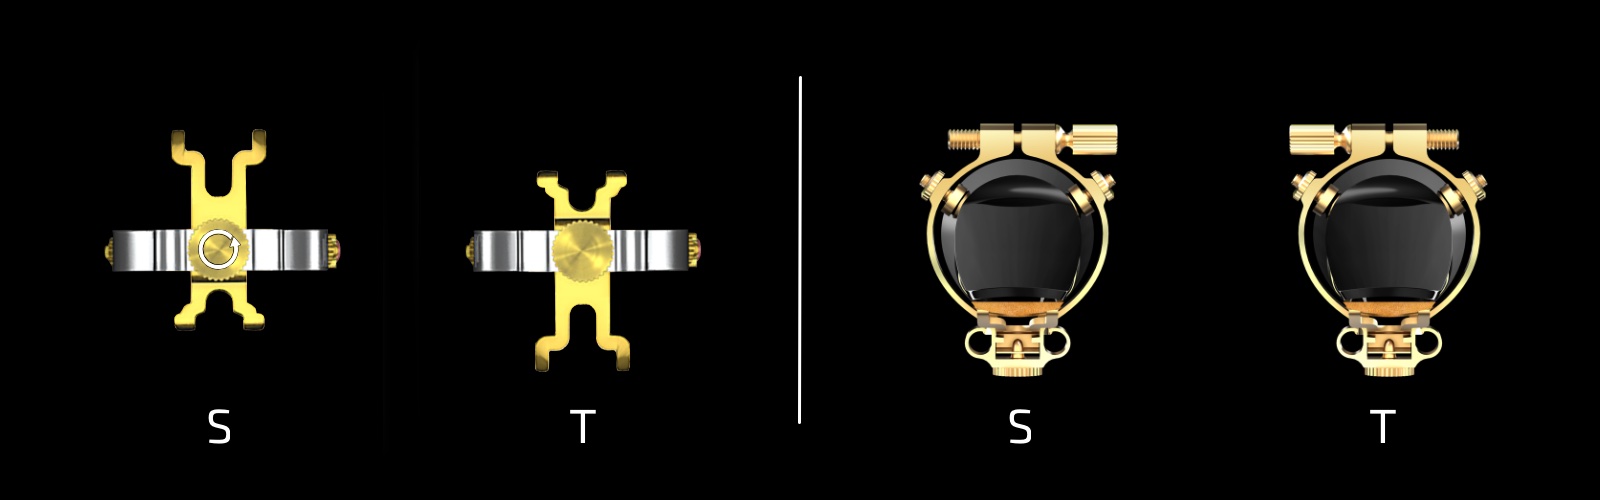
Adaptation of ligature for left-handed / right-handed
|
 |
|
All ligatures are mounted right-handed, you can reverse the direction of the base after unscrewing the base screw with the pliers :
- S : Position for right-handed
- T : Position for left-handed, belt screw left
|
|
|
|
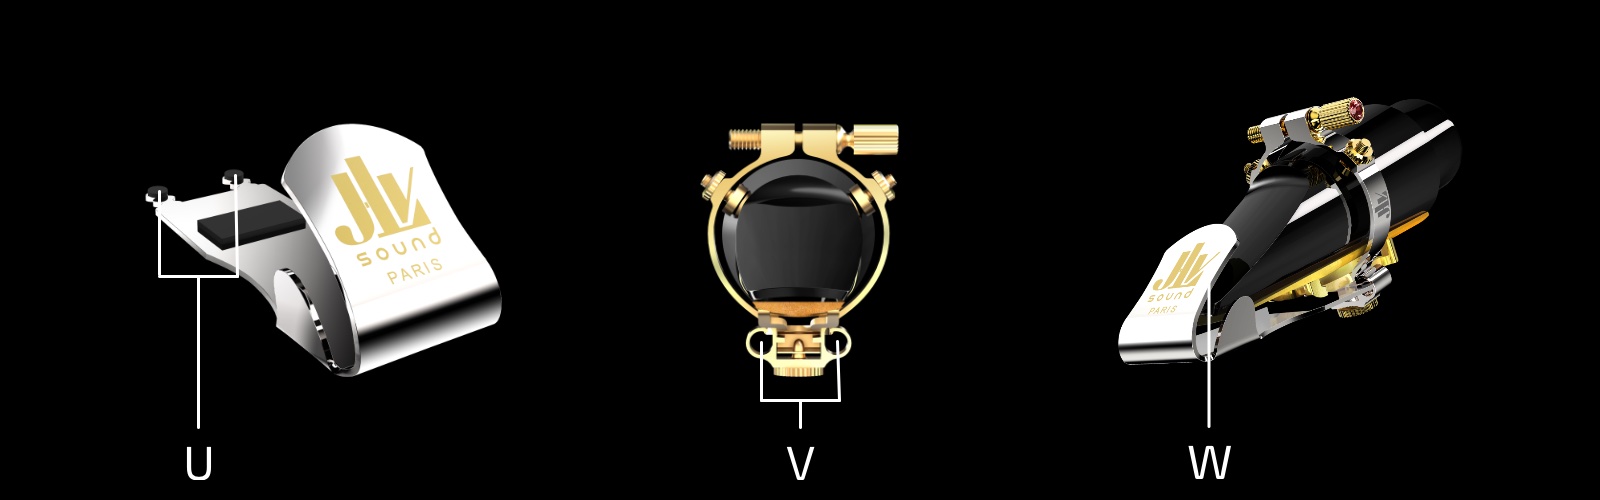
Placing the mouthpiece cover on the ligature
|
|
|
|
For set up the mouthpiece cover, insert the pins in the two rings of the ligature :
- U : Spigots of mouthpiece cover
- V : Rings of the ligature
- W : The covering part of the mouthpiece cover
The foam behind the covering part must be in contact with the mouthpiece. For particular mouthpiece sizes, you can reduce or enlarge the angle, for this you must put the mouthpiece cover on a flat surface and lightly press or pull the covering part.
|
|
|
|
Discover the user manual in video
|
|
|
|
|
|
|